Creating callouts for images and videos
You can use Narakeet to highlight interesting areas of images and videos. For example, to point viewers to a specific area of a screen for a video tutorial.

- Quick tutorial on callouts
- Creating callouts in markdown
- Using the callout designer
- Executable example
- More information
Quick tutorial on callouts
To see a quick demo of callouts in action, and instructions on how to use the callouts designer, check out the video below.
Creating callouts in markdown
To create a callout, include an image or a video resource in the script as usual, then add a callout stage direction. For a circle, specify the center coordinates, and optionally the radius.

(callout:
cx: 200
cy: 250
size: 150)
You can also add callouts to a video, or a video segment, as well as make rectangular callouts.

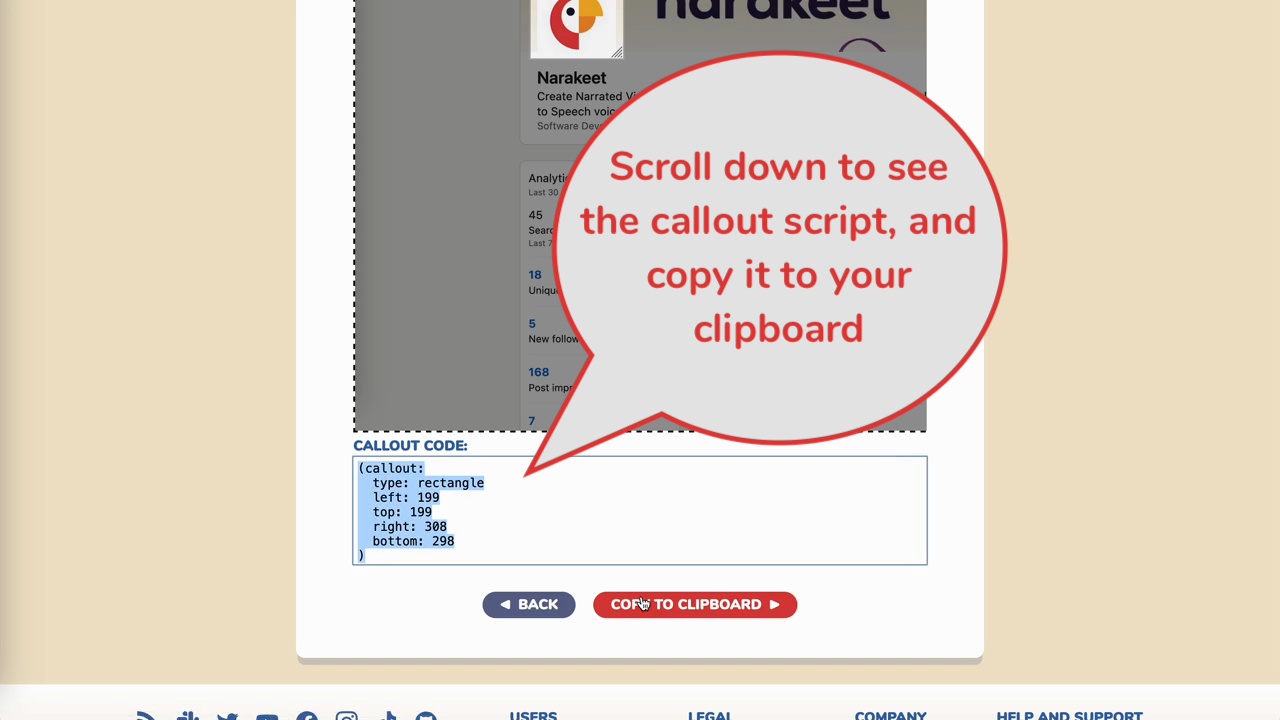
(callout:
type: rectangle
left: 436
top: 468
right: 845
bottom: 599
)
Using the callout designer
Figuring out the right coordinates for a callout can be tricky by hand, because they depend on the size of the video frame, the dimensions of the source image and the asset framing or resizing method you use. To help you create callouts quickly, you can use our visual callouts designer.
To access the callout designer, just start a new scripted video project, and upload the images or videos you want to mark up.
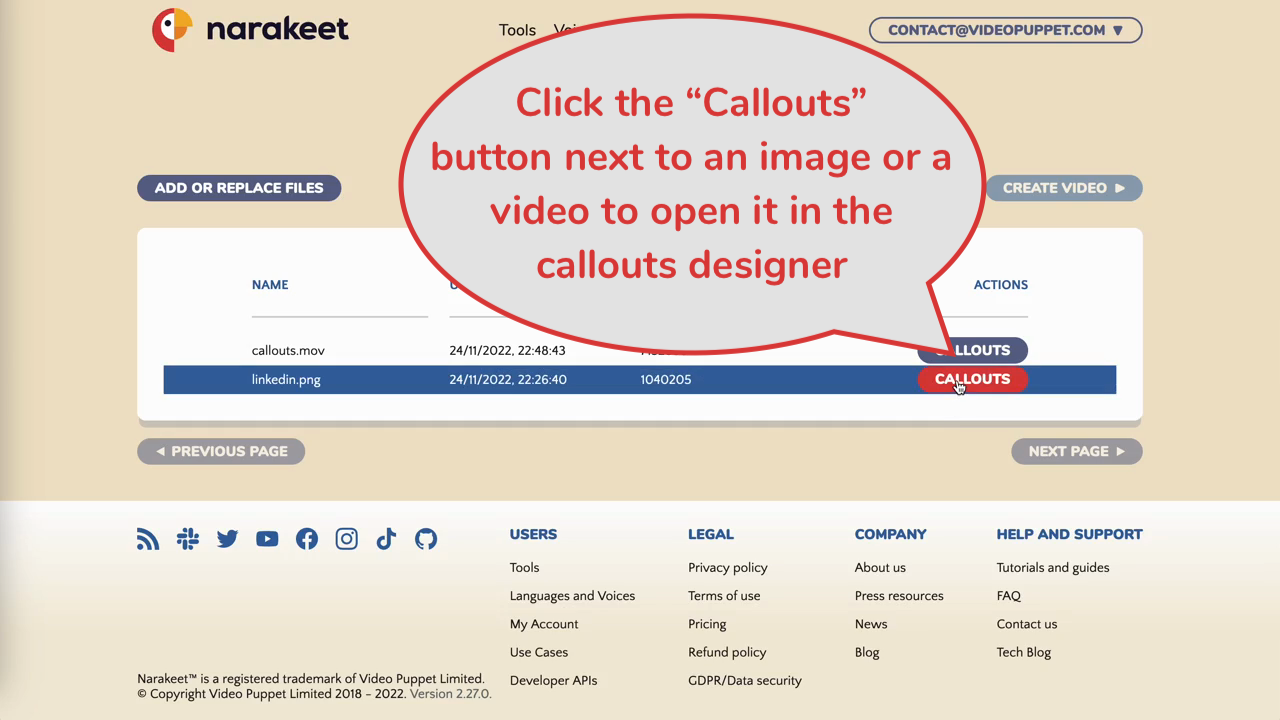
Once the upload completes, you’ll see a “Callouts” button next to images and videos in the file list.

Click the callouts button next to the image or video you want to mark up, and you’ll open it in the designer.

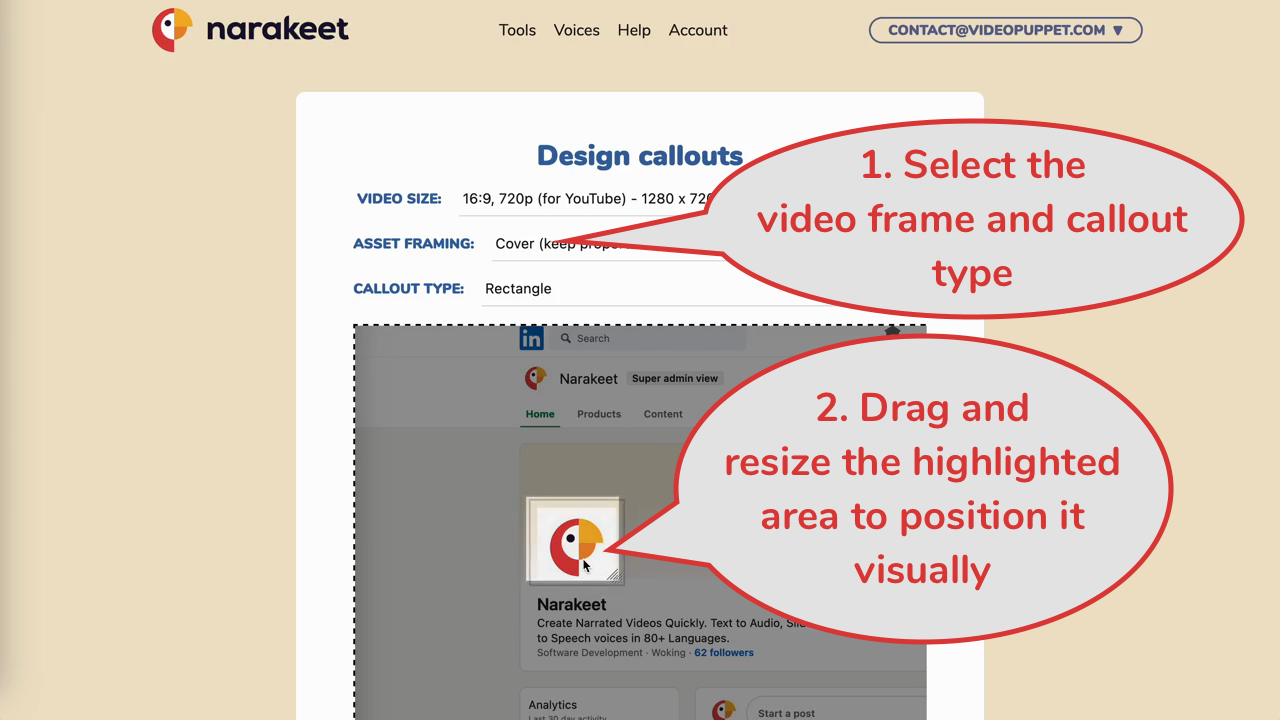
Use the drop-downs at the top to select the target video frame, image resizing and callout type, then move and resize the callout to highlight the important area.

Executable example
Check out the callouts example project on GitHub to see the key features explained in this tutorial in action.
More information
For more information, check out the callout format documentation.